
Traits and mounts keep adding power after your squad is evolved, and both are easy to waste. A Legendary Love Wreath spent on the wrong pair is gone, and a mount pushed to level 100 early ties up coins that should have taken three mounts to level 70 first. Here is what to breed, which mounts to buy, and when to stop levelling each one.
Breeding without wasting wreaths

Breed with low-rarity (blue) Palmon first. They let you roll for the trait you want without spending gold wreaths, and once the trait appears you can move it onto the Palmon that matters. The same logic applies to your best combat traits: build a set of S+ offensive traits on an SR first, then transfer it to your UR attackers.
Control the outcome by controlling the parents. When both parents carry the same traits, or leave slots empty, the offspring can only roll from four possible traits, which turns a lottery into a short list.
Save Legendary Love Wreaths for one job: carrying 4-star traits over to offspring. Using them on ordinary pairings is the most expensive mistake in the system. The Guild Nursery is the other shortcut; pairing a blue Palmon with a guild member's gold Palmon can produce Super S traits, and trading traits with active guild members speeds everything up.
Mythic Palmon are the exception. Each account gets one copy of each Mythic, its traits are fixed, and it cannot enter the Nursery at all, so there is no point planning a breed around one.
Which traits to breed for
Match traits to the Palmon's job. Attackers want Attack and critical-hit traits; defenders want Defense, critical damage reduction and HP. Iron Will works on either but leans defensive, and Warlike suits a defender once its defensive slots are already filled.
A full set of four S+ offensive traits adds up to 10% Attack, 8% Accuracy, 8% Crit Rate and 15% Crit Damage on one Palmon, which is why the set is worth building once and moving around rather than rolling fresh for each attacker.
Camp workers want worker traits instead, which cut construction and research timers. Keep that as a separate breeding line so it never competes with your carries for the good pairings; the camp and jobs guide covers which workers to give them.
Breed for your carries first. Your three damage dealers turn every trait point into damage, while a buffer like Regalion or Battereina does its job through a passive that traits barely change. Once the carries are finished, move on to the front row, where HP and Defense traits keep the buffers alive long enough to matter.
 NinjumpWater Backliner
Carry: traits first
 RegalionWater Frontliner
Passive buffer: later
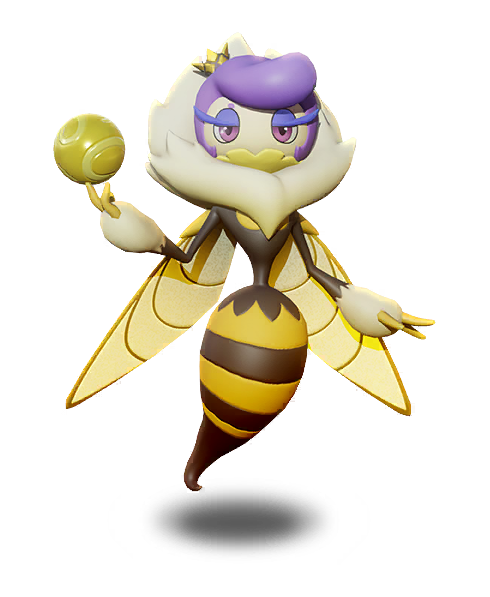 BattereinaElectric Backliner
Passive buffer: later
Swap traits instead of rebuilding
If you catch a second copy of a Palmon you have already built, don't rebuild it. Traits can be swapped directly between identical Palmon with the arrow buttons in the Nursery, on a cooldown of roughly ten minutes. That lets you move a finished trait set onto a better-starred copy in minutes instead of breeding it again.
Prismatic Palmon
Prismatic colours are cosmetic and come from catching, not the Hatchery. After you use 20 catchers on wild Palmon, a Prismatic wheel can appear on catch attempts and award Prismatic Vials; 100 vials recolour any Palmon you choose. Eggs never produce a Prismatic, so don't farm the Hatchery for one.
Don't plan around the wheel. Catchers are what raise your Palmon to 4 stars, so spend them on the Palmon you are building and let the vials pile up on the side. A recolour changes nothing in battle, which puts it last on the list.
Where this fits in your spending
Traits and mounts come after stars and Evolution, not before. A trait set on a 3-star Palmon is wasted the moment you replace it, and a mount skill cannot rescue a squad that is missing its buffers. Build the squad first, then breed traits for the Palmon you know you will keep, then level mounts. The one exception is Bunny Runny, which helps every squad from day one and is worth buying early.
The seven mounts
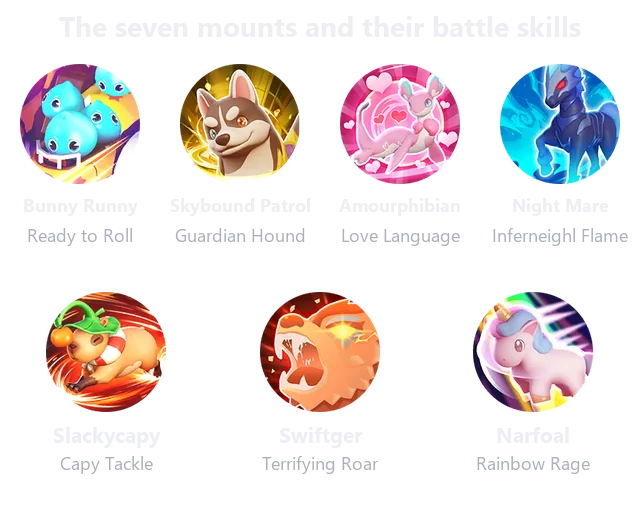
Every UR mount gives the same Palmon stat bonus at level 100, so the choice comes down to the skill, and the skill is what to plan around. Skill levels unlock in steps as the mount levels, and the final step at level 100 is a big jump: Bunny Runny's Armigo Capacity goes from 8% at level 99 to 10% at level 100, and Narfoal's Attack bonus doubles. Skip Swiftger and Narfoal for combat; a flat bonus falls behind as your squad grows.
| Mount | Rarity | Skill at mount level 100 | What it does for you |
|---|---|---|---|
| Bunny Runny | UR | Ready to Roll: all Palmon Armigo Capacity +10% | More Armigo for every squad |
| Skybound Patrol | UR | Guardian Hound: your highest-Attack Palmon survives a fatal hit for 6.6s and regains 70 Rage | Keeps your carry alive for one more Rage Skill |
| Amourphibian | UR | Love Language: front row takes 30% less damage for the first 10s | Protects the front through the opening burst |
| Night Mare | UR | Inferneighl Flame: enemies take 10% more damage per hit for 15s | A team-wide damage boost |
| Slackycapy | UR | Capy Tackle: a 20,000,000-damage charge with a stun, plus Cornucapya: camp Lumber, Gold and Steel +100% | Camp economy first |
| Swiftger | UR | Terrifying Roar: flat damage to every enemy | Flat damage that falls behind as enemies scale |
| Narfoal | SSR | Rainbow Rage: +9,000 Attack for your Palmon at battle start | The one SSR mount, with a lower stat bonus |
Mount order and levels
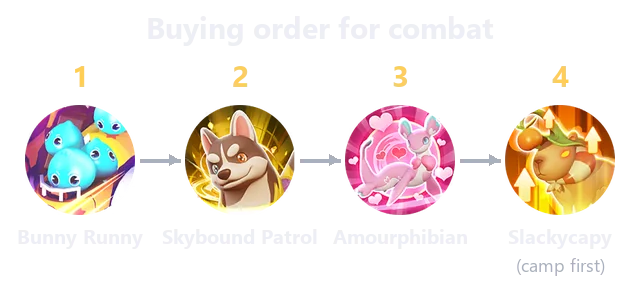
Buy Bunny Runny first. Extra Armigo Capacity helps every squad in every fight, and it pays off most once your Armigo are level 7 or higher. Skybound Patrol comes next if your top damage dealer keeps dying before its second Rage Skill; Amourphibian follows, and Slackycapy goes last for combat, since its best skill is a camp bonus.
Level in stages. Take Bunny Runny, Night Mare and Amourphibian to level 70 first: level 69 unlocks their third skill level, the cheapest meaningful step. Skybound Patrol only needs level 30 while the others catch up. Push mounts to 100 one at a time, and only after every mount you use has reached 70.
If you have already bought a mount the shop later gives away, the shop refunds mount coins for it, so an early purchase is not wasted.