
Most losses in Overgeared Hero aren't about power. They come from bringing the wrong build to a boss that punishes it. Enemy families come as a Minion, Elite and Boss trio sharing one mechanic, with the Elite and Boss getting more of it, so an Elite shows you what its Boss will do. This guide lists every family's mechanic from the game's own data and the counter for each, then covers the swaps that fix most walls: healing cuts, Spike bosses, Dodge, Stun and immunities.
How encounters are structured
Chapter Challenge rounds 1 to 3, 5 to 7 and 9 to 11 are Minions, rounds 4 and 8 are Elites, and round 12 is the Boss; some chapters are 5 rounds of Boss only. Tower of Trials is 100 floors of 10 sub-floors, with a Boss on every tenth, and you can't shop mid-floor or use pet actives there. Pet, Hero and Blessing Dungeons are daily runs that end on one of the unique bosses listed further down. The Beginner guide covers tickets and energy.
Use each Elite as a preview. Its Boss does the same thing with bigger numbers or a full immunity, so when an Elite heals, steals buffs or hits back with Spike, start shopping for that counter before the Boss round arrives.
Healing bosses: cut the healing, then hit
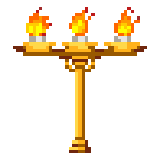
Healers are the most common wall, and the counter is the same every time: Ice Reaper plus a Candlestick. Ice Reaper cuts enemy healing by 40% when you fire it and adds 15 Freeze, and the Candlestick, merged from a Torch and a Spear, cuts another 50%. With both running, a Blood-Red Priest or a regenerating boss barely heals at all. A spare Torch adds 15% more.
Time Ice Reaper to the rounds that heal. On a boss that doesn't heal, its Freeze slows the boss's attacks, and on a Spike build fewer attacks means fewer counters, so firing it there costs damage. Once the healers are behind you, sell the Candlestick and Torches for space. Skeleton Reaper is the Rare fallback: a 45% healing cut and 10 Freeze, if you haven't got Ice Reaper yet.


Spike bosses: the one fight Spark loses
An enemy with Spike counterattacks every hit it takes. Spark's strength is many fast hits and Stun, so against Spike she triggers a counter on every hit and can kill herself. This is the best reason to keep a second hero built.
The fix is either a hero who takes the Spike away or one who hits hard in few hits. Rose and Barbarian can steal the enemy's Spike, and a Bloodletting Sword with a Bloody Crown removes it, which makes Rose, Rebecca or Barbarian the usual swap. A Ranger such as Raven or Acrobat with Primal Flame and Plague gloves also works, adding Crow Necklaces for buff removal. Fire Mage has cleared these with a Mage shield and heavy shielding. If your Warriors aren't built, stock up on buff removal or buff stealing.



Dodge, Stun, Crit and immunities: the pet swaps
Pet choice should change with the stage, and most counters are a single pet swap. Against Dodge bosses, bring Hunting Hawk: it strips 10 Focus or Dodge every 4 seconds and gains 60% Haste once the enemy holds 30 or more of them combined. Against Stun enemies, Yeti makes you immune to Stun for 10 seconds and counterattacks each Stun it resists. Against Crit-heavy bosses, Phoenix lowers enemy Crit Rate by 2% for every Burn stack, up to 40%.
Red Dragon is the default damage pet because it removes 40% of the enemy's Max HP when the fight starts, but bench it on multi-floor stages. Geezer is a good swap there: at 2 stars its free item is effectively free gold. In PvP, remember Red Dragon can't be used against Crows.
Immunities call for the second build. Burn-immune floors want a Poison Bow build or Spike, and fire-resistant stages often fall to Spike alone. Flora is the answer to debuff-heavy fights, cleansing 10 random debuffs every 4 seconds, which clears poison stacks before they add up.




Chapters and Tower: the core bestiary
The families you'll fight from the first chapter through the Tower's early floors. Three have no special mechanic and reward whatever build you're running; the rest each punish one plan and have a clear counter.
| Family | Mechanic | What to bring |
|---|---|---|
| Skeleton Fighter / Knight / Ice Caller | Gains Block. | Rose, whose Spike, Poison and Burn ignore Block, or Spear-type weapons that strip Block on hit. |
| Skeleton Warrior / Swordsman / General | No special trait. | Anything. A good line to test a new build against. |
| Werewolf (Wandering / Tracker / Captain) | Attacks noticeably faster than normal. | A Spike build: every extra attack is one more counter. |
| Wraithbird (Archer / Hunter / Piercing) | Reduces your healing. | Don't lean on healing or Vamp; Block and raw damage hold up. |
| Skeleton Bat (Stray / Raider / Boss) | Has Vamp — heals off its own attacks. | Ice Reaper or a Candlestick to cut the healing it gets from its hits. |
| Skeleton Charger / Champion / Crusher | Hammer hits Stun you. | Yeti's Stun immunity, or Jellyfish Princess, whose Spike keeps coming while you're stunned. |
| Wraith (Dualblade / Spearmaster / Harpooner) | Attacks very fast at first, slows over time. | Block or HP to survive the opening burst; it gets easier as the fight goes on. |
| Ember / Fireball / Burning Calamity | Inflicts Burn; resists or is immune to it. | Poison or Spike instead of Burn. |
| Blood-Red (Deacon / Acolyte / Priest) | Continuously heals. | Ice Reaper plus a Candlestick: 40% and 50% healing cut together. |
| Skeleton Brawler / Champion / Blue Horror | Has Spike — counterattacks your hits. | Rose or Barbarian, who steal Spike, or a Bloodletting Sword with a Bloody Crown. Never a multi-hit Spark. |
| Stitched (Flesh / Giant / Horror) | Extra damage to, and a chance to pierce, your Block. | HP over Block; Block is what it's built to break. |
| Dark Forest (Patrolman / Marksman / Watcher) | On-hit chance to Seal your weapon. | Several weapons, so one Seal doesn't stop the run. |
| Frostfang (Young / Adult / Boss) | Inflicts Freeze; resists or is immune to it. | Skip Freeze builds; Burn or raw damage instead. |
| Entwined / Mesmerized / Mesmerizing Shadow | Continuously steals your buffs. | Take buff items out of the backpack for this fight. |
| Corrupted (Ranger / Sniper / Sharpshooter) | High Crit Rate and Accuracy. | Phoenix, which cuts enemy Crit Rate by 2% per Burn stack. |
| Sword (Swaying / Dancing / Danse Macabre) | Gets faster the longer the fight runs. | End it early: Red Dragon's opening hit and a fast burn build. |
| Goblin (Storyteller / Shaman / Priest) | Inflicts Poison; resists or is immune to it. | A Broom or Flora to clear the Poison; skip a poison build. |
| Fallen (Pharmacist / Healer / Plague Doctor) | Regens HP, resists debuffs, and self-cleanses. | A healing cut and fast damage, before the cleanse wipes your debuffs. |
| Slime (Hardened / Armored / Sir Slime) | Weapon damage capped near 1; takes bonus Spike/Burn/Poison. | Spike, Burn or Poison, which it takes extra damage from. A Sword-stack Warrior struggles. |
| Wraith (Vanguard / Javelin / Soul Hunter) | Low per-hit damage, but hits many times. | Spike turns every one of those hits back on it. |
| Pale Ghost (Fighter / Spearman / Knight) | Has Dodge; resists or is immune to Stun. | Hunting Hawk to strip its Dodge; don't plan around Stun. |
Chapters 151 and up: the harder bestiary
New families join from Chapter 151 and also show up in the Tower. Two of them decide builds on their own: Crystal enemies ignore Burn and Poison, and Mummies Seal any weapon that fails to Crit. Keep a raw-damage build and a Crit build ready before you push into these chapters.
| Family | Mechanic | What to bring |
|---|---|---|
| Lizard (Volcanic / Magma / Magma Wyrm) | Counterattacks with Burn when hit; cleanses its own Burn on an overheal. | Keep your Block up: it burns you hard whenever you have none. |
| Mummy (Forgotten / Unearthed / Ancient) | Seals your weapon on a non-Crit hit; takes much more Crit damage. | A Crit build; a Rope Trap between two weapons raises their Crit Rate. |
| Crystal (Sentry / Warden / Golem) | Resists Spike; immune to Burn and Poison; takes more weapon damage. | Raw weapon damage; Spike, Burn and Poison do little here. |
| Evil God (Cultist / Priest / Apostle) | Goes briefly Invincible at low HP and unseals its own weapons when it does. | Burst through rather than relying on Seal control. |
| Sea Spirit (Jellyfish / Deep Sea Spawn / Spirit) | Takes bonus damage per Freeze stack on it; resists Burn. | A Freeze-stacking Wizard build is close to a hard counter. |
Chapters 171 and up: Smoldering Ghost
The current late-game family: Smoldering Ghost Warrior, Spearman and Knight. They resist Burn and Stun, and the Elite and Boss are immune to both. That shuts off the Primal Flame default and the Spark Stun lock at once, so this is where your second build earns its keep.
- Skip both Burn and Stun tech against this line.
- Poison, Spike or raw weapon damage all still work normally.
Dungeon bosses: one unique fight each
The daily Pet, Hero and Blessing Dungeons each end on their own standalone boss, with no Minion or Elite lead-in to warn you. Check which boss the dungeon ends on before you pick a hero, because several of them hard-counter one plan and hand a free win to another.
| Boss | Found in | Mechanic | What to bring |
|---|---|---|---|
| Nest Guardian Golem | Pet Dungeon | Very high HP and damage reduction, but takes a burst hit every 10th time it's struck. | A fast multi-hit build, such as Spark with Thunder Dragon, reaches the tenth hit quickly. |
| Harpy Grand Master | Pet Dungeon | Gains a large Block at the start and takes far less damage while it holds. | Rose's Block-ignoring damage, or Spear-type weapons that strip Block. |
| Springwater Spirit | Pet Dungeon | Takes significantly more Poison damage. | A Venom poison build is close to a free win. |
| Vault Guardian | Hero Dungeon | Continuously converts its own HP into Block. | Poison and Burn over time; with Rose they go straight through the Block. |
| Haunted Backpack | Hero Dungeon | Continuously gains Dodge. | Hunting Hawk or Eagle to strip the Dodge as it builds. |
| Giant Gem Worm | Hero Dungeon | Fast attacks, a big Spike payoff, and resistance to weapon damage. | Poison, Burn or Spells over weapon hits; keep multi-hit builds away from its Spike. |
| Revived Hydra | Blessing Dungeon | Continuously heals; very vulnerable to Healing Reduction. | Ice Reaper and a Candlestick; its healing is its weakness. |
| The Last Thunder Dragon | Blessing Dungeon | Hits hard enough to Stun you. | Yeti's Stun immunity, or Block and HP to ride out the Stun. |
Clan Raid: Sealed Manticore
The Clan Raid boss can't die to execute effects or damage based on a percentage of its HP, which shuts down Rose's Parting Rose and Red Dragon's opening hit alike. The fight also has a hard 15-second time limit with no berserk phase to bail you out.
Bring plain high damage that closes the fight inside the timer. A slow build that relies on damage over time won't finish it. For rings, Garnet beats Archwizard's here: its 25% Burn boost is there from the first second, while Archwizard's needs a longer fight to catch up.
Mistakes against bosses
Building for the Minions. Chapter rounds 1 to 3 fall to almost anything, and the build you finish is the one that faces round 12, so shop for the Boss from the first Elite onward.
Keeping the healing cut after the healers. Candlestick and Torches take backpack space that armor or weapons need in the later rounds.
Forcing Burn into Burn resistance. Ember, Crystal and Smoldering Ghost enemies all resist or ignore it, and a second build clears them faster than a stronger version of the first.